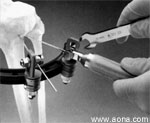
To apply the tensioner to the wire, manually turn the fluted knob counterclockwise until the wire passes freely through the cannulation.


To apply the tensioner to the wire, manually turn the fluted
knob counterclockwise until the wire passes freely through the
cannulation.

Advance the tensioner over the fingertightened end of the wire,
until its concave end seats against the wire/pin vise.
Note: For Reduction Wires, wrench-tighten the wire-locking nut on the "olive-end" of the wire.

Turn the knob clockwise by hand until the desired tension is reached.
If necessary, use the ratchet wrench to achieve the desired tension.

The amount of tension being applied to the wires is indicated by
the position of the knob relative to the numbered lines etched
on the tensioner body. Wires are generally tensioned to 100-130 kg.

When the desired tension is reached, wrench tighten the wire-locking
nut. Turn the knob on the Wire Tensioner counterclockwise to release
the wire. Tension additional wires using the same procedure.
Special Technique Note:
If using a Reduction Wire to reduce small fragments, first stabilize the ring with at least two tensioned wires. Insert the Reduction Wire through the fragment until the "olive" contacts the bone. Attach the wire to the ring with two clamps and wrench-tighten the ring-locking nuts and finger-tighten both wire-locking nuts. Use the tensioner to pull the "olive" against the fragment until it is reduced and wrench-tighten both wire-locking nuts. Take care to avoid pulling the "olive" through the cortex.

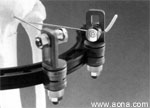
Use the Bending/Cutting Pliers to trim
excess wire, leaving 3 to 4 cm of wire to allow later retensioning,
if needed.

Bend wire ends using the Bending/Cutting Pliers.

Place protective caps on wire ends.
