Intraoperative Images
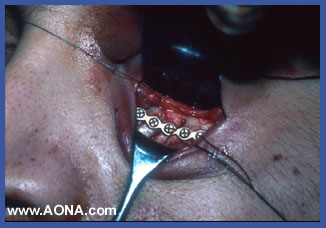
Figure 12
Figure 13
PREVIOUS PAGE
FIGURE LEGEND
INDEX PAGE
HOME PAGE